Wednesday, November 30, 2011

I Need Minions > DIY Christmas Gift Calendar

Today we are showing you another great DIY Christmas gift idea that everyone will love: personalized calendars. I know you're thinking, why would I want to make someone a calendar when there are 1000's of cool calendars out there at a reasonable price?  This gift combines a cool calendar with a bit of you and your family and their "unique" style. (we all know what and who I'm talking about, right?!)


I'm not talking about just any calendar but a calendar that you personalize with those millions of pics just sitting around that no one ever sees or appreciates, the pics that you want someone to see.  Even better, if you are giving this to a loved one who lives in a different state, they will get to see what really goes on in your life.  Hmmmm, this could be either a good thing or bad thing.  

Let's get to the meat of the project.  Did you know that there are "holidays" for almost every day of the year - or maybe there is one for every day of the year.  I don't know how these were designated as holidays but there are plenty of sites out there that list them.  I searched around and I like Gone-ta-Pott because it has silly holidays like "Cuddle Up Day" or "Talk Like a Pirate Day" or "Holy Batman! Day" (sadly the last two fall on the same day, so you just have to pick one.)   The holidays listed in the pic above are: Step In A Puddle and Splash Your Friend Day,  Feast of Fabulous Wild Men Day, International Skeptics Day, and National Hat Day.  Yes, it's true, we are a silly family and I have pictures that can be used for these holidays, and so do you!


How to make your personalized calendar:
Pick calendar - I like the desk top ones with the spiral bound edge.  TJ Maxx has a selection of calendars at a reasonable price or any bookstore or Amazon has many.  Be sure to pick a calendar that they will love!  Check these out:


Start by writing everyone's birthday and anniversary on the calendar.  Find pictures for all those events, it doesn't have to be taken on their birthday or even taken recently (use some of those old pics), just put in a flattering picture of everyone.  I can't stress the word flattering enough as I have seen people given photo gifts with unflattering pictures of them or loved ones and it was not a gift they cherished.


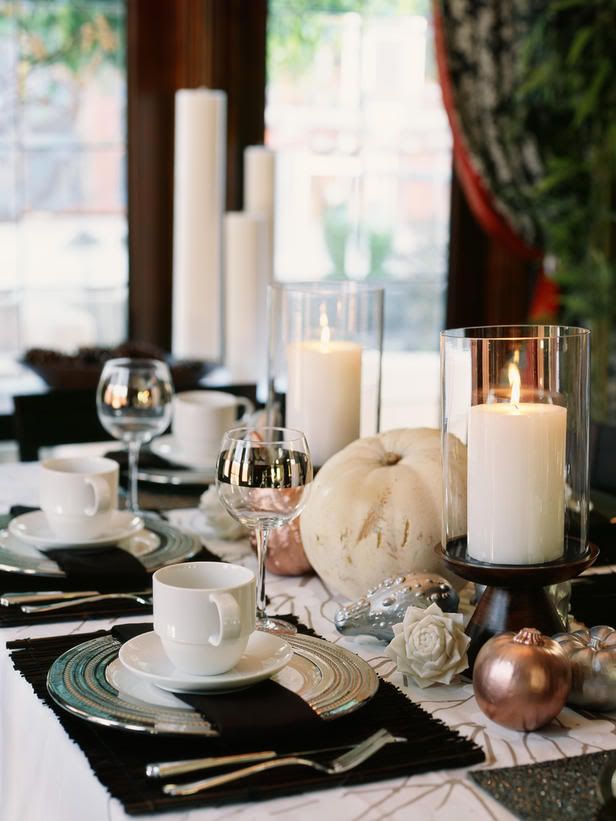
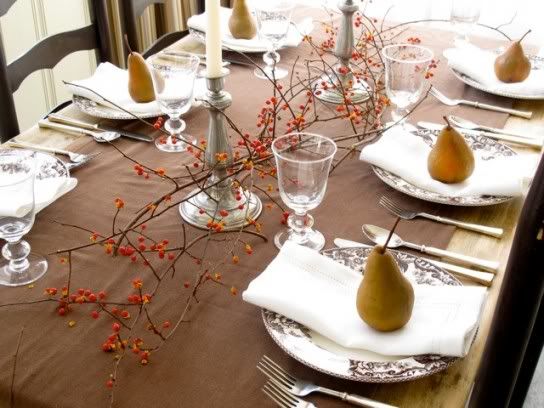
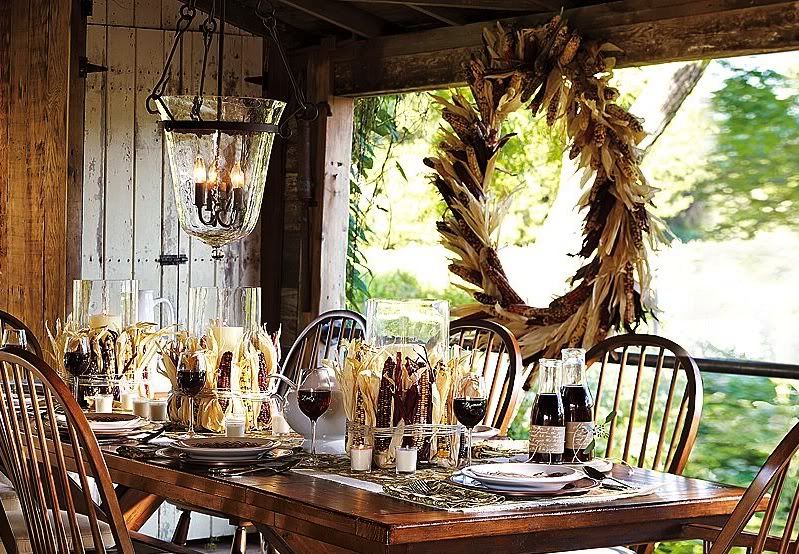
Start to fill in the rest of the pages with pics that fit the "Holiday."  Start with the standard holidays like 4th of July, Christmas, etc, and then start reading the list of the other obscure holidays.  There is a "Hug Day", "Best Friend's Day", "Go Fishing Day", and "Chaos Never Dies Day" to name a few.  Once you get started you will see ways to work quite a few of your pics in.  Here is some inspiration:


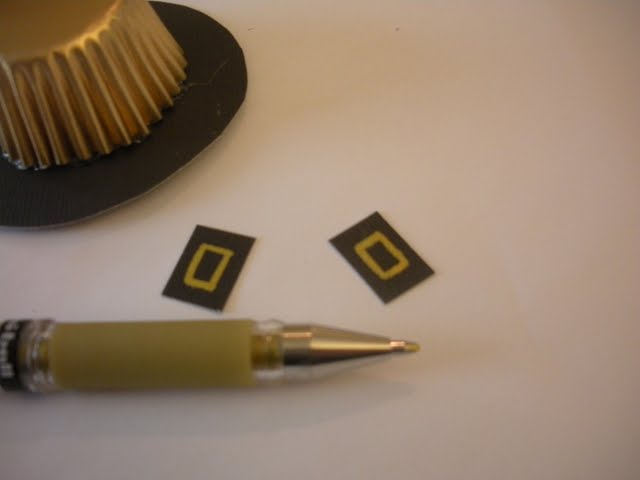
Measure the area that is open on your calendar for each date and crop pictures that size.   I cropped photos in Photoshop Elements (PE). Open photo and set crop size.  This will open a crop box on the picture that you can move around and resize, but will still keep it the set size ratio.  Crop, save, print, cut out and paste to calendar.

I can't tell you how much people love these.  I mean really, puppy of the month in a basket is cute, but not as adorable as your grand kids in a mud puddle! After you finish up your amazing personalized gift calendars, wrap them up, and then wait for the rush of orders next Christmas, when everyone wants another one.


-Laurie  

Tuesday, November 29, 2011

Celebrate, Celebrate, Celebrate > Thanksgiving Table Decor, Update!

Whew! What a Thanksgiving holiday! I hope all of you wonderful glossy readers had an amazing Thanksgiving, just as we did. It was all a blur with yummy food, turkey hats, gourmet beef jerky, and screams of, "Ewww, mom has her hand in the turkey's butt!" Oh, and there was some dancing and singing going on too. It was a typical Chaos and Gloss 3 ring circus, I mean holiday, and it was great!

Here are some pictures of what I came up with for this years Thanksgiving centerpiece and table decorations, as promised:


My color palette for this year was brown, bronze, gold, and cream. I got the gold and bronze garland from my favorite store, Hobby Lobby (otherwise know as the Crafter's Disneyland), as well as the feather balls.


I added in some pops of color with the robin's blue goblets and the red roses in the centerpiece.


Then I added in some feathers that I had hand plucked from my turkey...
Ok, no, not really. But I could.
*Note-I also had a small fire feature going on in my centerpiece as one of the candles lit a piece of the garland on fire. It was big excitement, but for safety's sake, move those candles back!

I hope everyone had a great day of giving thanks and spending time with all the people who love them.

~Angela

Wednesday, November 23, 2011

Celebrate Celebrate Celebrate > Thanksgiving Planner

It's that time of year again. The time of year when here at the Glossy Flossy's we have four months of celebrations and exhaustion.  We have September which is "Birthday Month" on steroids, Halloween (which we love to celebrate), Thanksgiving, then "The Jerk-Off" (hmmm, maybe we should keep you in suspense about that a little longer), Christmas and then it's New Year's Eve.  I'm getting tired just writing about.  The only way we can keep our sanity (what little we have or our version of "sanity") is to be very, very organized.  

Thanksgiving is a huge undertaking of cooking, cooking, cooking, and a little cleaning all ending with that fave of everyone's - BLACK FRIDAY!!!!  I'm a lover of black clothes and black furniture but I think that Black Friday should be called "Best excuse to shop for 24 hours straight" Day or "Olympics of Shopping" Day because lets be honest; only the best competitive shopper will survive and triumph on Black Friday. The name for that day should convey the happiness high you get from shopping. Okay, now that I have unburdened myself, back to the organization of Thanksgiving.  

Angela Glossy Flossy has Thanksgiving at her house because she thinks it's inappropriate for me to still have my Halloween decorations up at Thanksgiving she looooves to cook.  To help you, dear readers stay on track for your Thanksgiving; we are giving you a Thanksgiving Planner to make your very own!  
Included in this Planner:
  • Calendar
  • Menu Planner
  • Shopping List
  • Cooking Plan
  • Cooking Timeline
  • Guest List
  • To Do List
  • Thanksgiving Day Timeline - list all your activities.  Don't forget to list that flag football game or turkey trot!
  • Reference List - Some important sites are listed including Butterball, Ocean Spray & King Arthur Flour to name a few.
  • Thanksgiving Tips - A week by week countdown.  Don't forget to pick up some disposable containers for guests.
  • Black Friday Planner - The ultimate planning list to let you organize your shopping including a spot for listing the time the store opens.
  • Tabs for you to print and cut-out to make your very own Thanksgiving Planner extraordinaire.
Because this planner is so huge (and because I'm a novice at doing this and I don't know any better) I broke it down to three sections.
Part 1 Thanksgiving Planner - Cover page, spine & tabs, reference & suggested list of when to do everything.  
Part 2 Thanksgiving Planner - Calendar, menu planner, shopping list, Black Friday Plan & extra landscape page.
Part 3 Thanksgiving Planner - Guest List, To Do List, Cooking Plan, Cooking Schedule, Thanksgiving Day Timeline, & extra blank page.
  
There is also a page called Thanksgiving Planner Printing Tips that you can use if you are downloading pdf to your computer and printing from downloaded copy.


Okay, make like a pilgrim, and go forth and start planning!
-Laurie

Tuesday, November 22, 2011

Celebrate, Celebrate, Celebrate > Thanksgiving Table Decor

I'm about to get real ladies, so prepare yourselves...I do not like to decorate my table on Thanksgiving! There. I said it. Well...that's not really the whole truth. Really what I don't like is the pressure to have an "amazing tablescape that enhances the color and experience of the food's presentation"(that was straight from House Beautiful, where do these people find the time?!).

After several days and several hours of running around like a crazed woman, for all my Thanksgiving preparations, my table decor ranks last on my list, right down there with giving the dog a bath.

But I do love to decorate and sad looking tables are no fun at a party, so I found some great, budget friendly, and easy Thanksgiving decor; that will make you and your green bean casserole, look like a rock star!

Green apples and an a cute assortment of pumpkins. Love the ruffled chair bands! Check the sideboard.
{Apartment Therapy}

Simple and fragrant bunches of sage leaf.

Using metallic sprayed gourds and white pumpkins. Gorgeous!

{source: Bobbi Fabian via HGTV}

Simple berry vine and pear place settings

{Williams Sonoma}


Love the rustic feel of this one. You could even put the husks in the inside of the hurricane vase and use flameless candles.


{Pottery Barn}

Or how about changing it up and using some non traditional colors


Here's another with the hurricanes, this time with colorful fall leaves (and I'm assuming flameless candles!)

Or go whimiscal with family photos and faux pumpkin pie place settings

Speaking of whimiscal, check out this cute and fun owl theme. Love the branch placecards.
Thanksgiving Holiday Table Owls - White and Gold
{Hostess with the Mostess}

Love. Love. Love the antlers! This is a great unique version of the Thanksgiving table.
antlers centerpiece on a vintage mirror with pinecones & white pumpkins silver and white dishes on ikat

Remember to make it fun and easy! I hope I gave you some great inspiration. I will show you what I came up with for mine after Thanksgiving.

~Angela

Monday, November 21, 2011

I Need Minions > DIY Christmas Cookbook Gift

Okay, all of you amazing cooks with "secret" delicious recipes - now is the time to share the bounty with your family and friends.  A couple of years ago I made cookbooks for all my kids with all my recipes that I cooked while they were growing up, plus all the new things that I have added through the years.  This was appreciated by all - at least I think it was.  If you don't already have a cookbook for yourself this will help you out because while you're making everyone else's cookbook you can also make one for yourself.  Two gifts in one, woohoo!

This is a fairly easy project.

Supplies:
Lots of Paper and Printer Ink
Few sheets of Cardstock
All your recipes
3" 9X8 Binder - it's one of those smaller binders
2 Clear Project Files from Office Depot


I printed all my recipes out 2 to a page and cut paper in half so each recipe page is 5 1/2" x 8 1/2".  Then 3 hole punch each page to fit in binder.


Organize by category and put in binder.


Make divider sheet with tab for each category.   This one was made in Photoshop but you can make dividers in any program or you could cut scrapbook paper to the proper size and use that.
Leave the original cover or make a cute cover like the one above.


I also put 2 of these handy protectors in each cookbook so that they have a splatter free cover for easy use when they pull out a recipe.  I cut down a clear project file from Office Depot to 6" X 9" size and used my handy corner rounder to round the top right front corner.


As an extra bonus I am giving you this wonderful recipe for Pecan Tarts - I have been making these for about 30 years and they are the best tarts ever.  


PECAN TARTS


Shells:
½ c. butter                                1 tsp. almond extract
½ c. sugar                                 2 c. flour
2 egg yolks
Cream sugar & butter.  Stir in egg yolks, almond extract and flour.  Press evenly into tiny tart shells.  Bake in 4000 oven for 8 minutes. 

Filling:
½ c. butter                                1 c. chopped pecans
1/3 c. Karo dark corn syrup           1 c. powdered sugar

Bring butter, corn syrup and powdered sugar to boil.  Stir in pecans.  Spoon into baked shells.  Top with a pecan half.  Bake in 3500 oven for 5 minutes.


Note:  I don't usually top them with a pecan half before cooking.


Start printing & baking!
-Laurie

Friday, November 18, 2011

Frock Me Friday > Hats Your Ears Will Love

I thought that I would wrap up my hat obsession this week with one last ode to the fabulous hat. I mean why shouldn't your noggin get in on some fabulous accessorizing? Or as my grandma says, "You are robbing your body of heat when you don't wear a hat!" Lets join together and stop this horrible hate crime and grab yourselves one of these budget friendly (One is under $8.00!) cuties!

Winter Hat Galore
Nine West, Charlotte Russe, Fossil, Bebe, Betsey Johnson
All these beauties are under $40!
Hats To Love Your Ears In
Bebe, Goorin Bros., Charlotte Russe, The Limited
Great winter hats for girls on a budget


Quit stealing heat from your body! Really, it's just not nice.
Happy Shopping
~Angela

Thursday, November 17, 2011

I Need Minions > DIY Refrigerator Magnets & Bookmarks

This post was supposed to be for all you Moms and Grandmas who have a cache of great recipes, and sharing the bounty.... but I have been sidetracked by something that happened yesterday.  

What happened yesterday - GRANDKIDS, and the wonderfulness (is that a word?) of having them!  

I was supposed to pick up my oldest grandson at the dentist and drop him off at basketball camp.  Here's my facebook post:  Wait for Grandson at Dentist and drop off at basketball camp - 25 miles, 1 hour and 20 minutes.  Grandson turning around and running back to give me a hug, saying "Grandma, I love you" - PRICELESS!!!!  If you've been to the dentist or doctor you know they are never on time.  So after waiting 45 minutes (in the wrong parking lot, that's another story) he was finally finished, I drove him to the church (turned into wrong church), walked him into gym foyer and checked him in.  He was running into gym, when he turned around and said, "Oh, Grandma," ran back to me, hugged me and said "I love you."  I'm tearing up now just thinking about it.  Grandkids are great!  

Okay, that's my post - no not really but it made me think about gifts grandkids or kids can make for moms or grandmas because we are all sentimental (dare I say it) fools.  
Check out this magnet that's been on my refrigerator for years.  It's a little "Velveteen Rabbit" around the edges.  Mr. 2Wicked made this eons ago and yup, it's still on my refrigerator!  It's a great way to recycle all those magnets you get from businesses (sometimes they are attached to your phone book), save the dates, some charities, etc. and fairly simple to make.  

  • Pick picture or artwork and decide whether to laminate or not.  I use my nifty Xyron to laminate top but I have also used clear Contact paper - which works great.  Xyron also makes a laminate/magnet cartridge.
  • Rough cut around picture or artwork.
  • Glue artwork or picture to magnet.  
  • Cut around artwork or picture and YOU'RE DONE!  Note:  The cheaper the magnet the thinner it will be and the easier to cut.

Doesn't get much easier than that - except doing this:  
Don't want to go to all that trouble - how about buying some of those 4X6 acrylic frames with the magnets on the back and putting photos in them.  My mom has her refrigerator covered with them, it's a photo essay into our lives - pics of my kids when they were six and nine next to pics of my grandkids at six and nine.  Every year someone gives her a couple of new pics for her refrigerator.  

Is your mom a reader?  That's a reader of books, not kindle (I'm old school) - how about making some photos into bookmarks?  Just made this bookmark -


 from this photo -----------------
and it took about 5 minutes,  too bad taking the picture and getting it on blog took 25 minutes! 


Print photo. I like to use glossy photo paper because I like the stiffness and gloss of the paper.
  • Rough cut out photo.
  • Laminate.
  • Cut out photo and you have this very, very cute bookmark.  This photo would also make a cute refrigerator magnet.

I also have this up on my message board.  I don't like clutter, but this has been up for quite a while because it makes me feel all warm and fuzzy inside.  I wrote on the back: "Aiden 4/11."  


How about making a magnet from a signed and dated statement from your kids to their Grandma so they can feel all warm and fuzzy too!

Secret Note to Grandmas:  Have your grandkids over and help them make some personalized gifts for Mom!

Get out your paper, glue, scissors and start crafting!
-Laurie (AKA "Sentimental Grandma")

Wednesday, November 16, 2011

Feast Your Eyes > Pilgrim Parfaits

If you know me, you know that I love hats. The bigger, the better.  I would have totally rocked a pilgrim hat back in the early settler days! Since I probably couldn't get away with wearing one these days, except for on Thanksgiving (hmmm...), I decided to put one on my dessert:
How cute is she?

This dessert is from our usual easy recipes - there really isn't one. I started out with some ginger cookies (Anna's) that I had smashed up. Next, I grabbed a can of pumpkin pie mix and added 1 egg and some condensed milk (directions on the back of can). I baked it in a sprayed pyrex pan and then let it cool. You could also make this the smeazy way (smart and lazy) and use premade pumpkin filling either from the bakery section of your store or even from a cheap, store bought, pie. Then I grabbed my nifty Pier One mini parfait glasses and filled them in layers using the cookie crumbs, pumpkin pie filling, and then topped it with creamy whipped cream. I think repeating layers would look great too.


Next, it's time to pretty up your glasses. You will need:
                                  
                                     *A couple of sheets of black cardstock
                         *Circle punch or round template
                         *Gold or black mini cupcake liners
                         *Hot glue or clear crafter's glue
                         *Ribbon
                         *Double sided tape 
                         *Gold gel pen


Grab a 2 1/2" or 3" circle punch and cut out the brims of your hats. Make an "X" in the center so that your parfait spoon will slide in. Now grab your mini cupcake liners and glue them to your circles. I found this is the easiest by placing your liner open end up, and adding glue to the inner ruffled rim of the liner, then placing the cardstock brim on top of the liner after you've centered it.

Now make your belt buckle by cutting small squares of black cardstock and adding an inner square with a gold gel pen.


Glue your buckles on and admire your cool crafty skillz.

 Now give your little guys a fancy belt with any kind of ribbon you like. Secure with double sided tape.

Now you have a dessert that will blow away that certain family member that at every holiday, acts like their homemade pies are made from divine angel tears. After all the oohing and aahing over these babies, you could probably even get away with a "Booya! In your face!", or you could just quietly gloat, but really, where's the fun in that?


I wonder what else I can add a hat to...
~Angela

Monday, November 14, 2011

Things Will Go Wrong > Reporting live from my closet


I intended to have a fabulously crafty post today.

Really, I did.

Instead, what I have, is one crazy disaster after another. Oh, BTW - I'm stuck in my closet.

So I decided share it with all of you in true Chaos & Gloss form. First up, the ugly:

THE CHAOS:
My computer's internal Wifi isn't working, so I am having to connect with a cable to my modem/router where it comes into my house- which is in my closet. Under the stairs.
It's all very Harry Potter-ish without all the fun magic and with a lot of swear words that I'm pretty sure Harry wouldn't say...


I am having to diaper my dog.
Yes, we here in my household have long since said goodbye to those days, but I am now having to wrestle down a jack russel terrier, that is possessed by the strength of a mastiff, to tape her into her doggie diaper. Yep. A doggie diaper.

All things motorized and mechanical at our house have decided to go on strike until further notice or until we have spent our all of our savings on them. They are not cheap dates. I am now wishing that I had bought that Missoni bike from Target so that I have some transportation...

I went to my son's very touching Veteran's Day assembly
in a great Frock Me Friday outfit, only to discover that my shirt was OBVIOUSLY inside out. Which was less mortifying because it was covered by a great chunky knit sweater. Until I started to sniffle and SWEAT from said sweater and the effort to not cry from all the heartfelt pictures and stories. My sweet son came over to hug me after it was over and said, "Mom, you are all sweaty and hot! Why don't you take off your sweater?" My son is a genius, which is great because his mother is an idiot.

I am having 20 people over to
 my house for Thanksgiving and my house looks like a bad game of I Spy. Ya know, can you spy the cordless phone in this Mount Everest pile of laundry... can you spy the your winter coat under this carpet made of shoes, hats, gloves, and backbacks...?!


THE GLOSS

My son came to me in the morning and said, "Hello, best momma in the whole wide world." Awwww. My heart melts.
Then he asked if he could have Halloween candy for breakfast, but I'm positive that the two are not related...

I also received a special, hand drawn, "monster identification book", because my other son said, "just in case, mom." So I am all set and protected if I come across any unidentifiable monsters.
Thanks, son!


Now I have to get out of this closet and clean, because somone's shoes really stink in here. A better post tomorrow, I promise!
~Angela


Friday, November 11, 2011

Frock Me Friday > It's All About The Bootie

Whaaat - the bootie?  You know the "ankle boot."  Were you thinking about a different bootie?  Okay, this is "Frock Me Friday" and my post was inspired by this to- die -for closet on Pinterest.  I have a serious crush on closets - I don't know why, that's probably a question for Dr. Phil.   You can't read it but the sign above the door says "Fairy Tales Do Come True."  REALLY, because you have open shelves for shoes.  YOU NEED MORE SHOES!!!!  I think booties or the ankle boot is the perfect transition between fall and the all out winter boot. Check out some of these great booties that I found.
Shoes: Louboutin Bootie, Shoes found at CharlotteRusse.com, Victoriasecret.com, Makemechic.com, Wanelo.com
Okay, maybe the open toed ones are not technically fall booties in all the states, but some people live in warmer states and the golden color of the one on the top right is a great fall color - it's kind of the same color as the Autumn banner that Angela Glossy Flossy posted the other day.  


Love the Bootie!!! (That's the ankle boot.)


Now back to my other crush.  Check out this closet.
Source: Marcusdesigninc.blogspot.com
If fairy tales do come true, then I'm sure all the shelves behind these doors are packed full of swoon worthy shoes.
-Laurie

Thursday, November 10, 2011

I Need Minions > DIY Personalized "Go Fish" Cards

Every year I like to make a few simple and quick gifts for Christmas, and this year we will be sharing our ideas for DIY gifts with you! First up is these cute "Go Fish" playing cards that I made and put in my oldest grandson's stocking when he was about 4 years old.  You all know the "Go Fish" game, but I added some extra "aawwhh" factor and personalized the game by using pics of family members instead.  The first time that my grandson and I played the game and I told him to "Go Fish," he said "No, Grandma - "Go Human!" Kids say the darnedest things - in our house we call this game "Go Human."  

Want to make your own "Go Human" cards? Well of course you do!
You will need:

  • 1 picture of each family member that you want to use - I made 52 cards total so I needed 13 pictures of family members (4 cards of each person).  That's my Mama in that picture. You could even add in pics of your family pets.
  • Fun and festive Scrapbook paper to adhere to back of picture.
And ... that's it!!  How simple is that?


The details:

  • Crop all photos to 3 1/2" x 2 1/2". I cropped photos in Photoshop Elements (PE) which made it quite easy to crop all photos to same size.  Open photo and set crop size to 3 1/2" x 2 1/2".  This will open a crop box on the picture that you can move around and resize, but will still keep it the set size ratio.  Crop and save.
  • Print photos.  In PE you can print eight on a page choosing "Print Package" in "Select Type of Print" Box. Then in the "Select a Layout" Box choose "Letter (8) 2.5 x 3.5", this will print eight of your cropped photos on one letter size page of photo paper.  
  • Rough cut photos out.  This means cut them down the middle so you have two strips of 4 pics each.  I would show you a picture of this but I didn't know I would be doing a blog back in the day!
  • Cut your scrapbook backing paper into strips the same size as your photo strips - 4 1/4" x 11".
  • Adhere the two together.  You can use whatever you want to glue these together.  I have lots of craft paraphernalia that I have to use to justify the owning it so I used my mini Xyron machine with permanent adhesive.
  • Cut cards apart.  Be sure to use the photo side of the card as a guide.  I have this nifty Fiskars cutter that I use.
  • Use a corner rounder punch to round each corner.  I like this EK Success corner rounder and use it all the time (I used it to round the accordion pleated medallions behind the elephant in the Circus Baby Boy Banner.)
Done! Easy Peasy! 


I was not paid to promote Xyron, Fiskars or EK Success products - although I'm not adverse to being paid - anyone listening?
- Laurie

Wednesday, November 9, 2011

Dress This Mess > Fall Decor

The quirkiness and fun of Halloween decorations is over. By now I'm sure you've packed up all your spooks and ghosts, and swept up all the black glitter like I have (*cough *cough...). Now it's on to Thanksgiving!

Truthfully for me, it's so hard to really get excited about fall decor like I do for Halloween or Christmas. The day is a WHOLE LOTTA WORK in one single, jam-packed day. Then, in a blur, it's over, with nothing left but a WHOLE LOTTA dirty dishes. The holiday is such a typical middle child (sorry Scott)! It's sandwiched in between the drama queen of Halloween and the "can do no wrong, over achiever" oldest child, Christmas. But middle child Thanksgiving needs some love and attention too! So here are some great decor ideas to celebrate overlooked Thanksgiving.

Simple leaf artwork in inexpensive frames


Leaf door monogram. BHG
Initial Greeting


Simple banner from twigs, grasses, and acorn tops. BHG
Autumn banner on door


Mum flocked pumpkins. BHG
Thanksgiving table decorations of pumkins covered in yellow and orange button mums

Wool felted Acorns from Etsy
christmas decorations thanksgiving decorations fall acorn centerpiece Chic and Cozy Centerpiece Idea for Thanksgiving Dinner


Fall wreath from painted acorns, from Little Things Bring Big Smiles


Easy and inexpensive!

Painted glass bottles. Love the possibilities!
Pinned Image

Maybe some of you reading this are thinking, "My Thanksgiving decor was up at exactly 9am, November 1st. I mean really! It's the 9th of November already, AND we were even given a whole extra hour on Sunday to decorate, and they are now just posting this?!" If this is you, then I'm surprised you are even here reading Chaos and Gloss and it's lazy ways - but we love you anyway! Maybe some of your fancy ways will rub off on us...

We have a special fall decor project we are working on so stay tuned!

~Angela
Related Posts Plugin for WordPress, Blogger...